Showing posts with label the beauty corner. Show all posts

Wednesday, July 15, 2015

Naked Smoky Palette Review!

 
Hello Beauties!
Its the moment you've all been waiting for! Urban Decay has finally released a brand new naked palette!
The Naked Smoky palette has been the biggest thing in make up news for the past month! And I have made a  review for you with my honest opinion to let you guys know the real deal when it comes to this palette. 
Its called the Naked Smokey pallets because it is designed to create the perfect Smokey eye. There are both light and dark shades in the palette. This gives you the option to use darker and lighter colors to create a Smoky but blended effect.
 (In paper sleeve)

(Palette out of sleeve)
 
(More Palette shots)
 
This Palette has 12 shadows with a mixture of both matte, satin, and shimmery finishes. It also comes with a double sided brush, with one end as a pencil and one as a blending. This palette retails for $52.


These are top quality eye shadows! Every single color is highly pigmented, non-powdery, and creates a beautiful look. They are easy to blend, and you receive a good amount of product for each color.
 
 (Colors from Left to right: High, Dirtysweet, Radar, Armor, Slanted)

 (Dagger, Black Marked, Smolder, Password, Whiskey)

(Smolder, Password, Whiskey, Combust, Thirteen)
 
This palette also has a very large mirror which is helpful if you need to travel with the palette.
 
 
 The design of the palette is also very cool, it is a light grey color with dark grey swirls and wisps of color to give in the look of smoke inside. It has an almost marbled effect.
The palette closes with a magnetic closure which I am a big fan of because if you don't close the palette all the way, you don't have to worry about trying to pop open like other palettes would.
Also the back of the pallets is dark grey with more dark grey swirls. It is a plastic material and is see through which gives it a cool hazy effect.
 
One final thing included with the Naked Smoky Palette is a step by step guide on how to create four different smoky looks. This is great for beginners, or people who aren't as experienced in creating Smokey eyes. The looks also range from extremely wearable to very dramatic.
 
I love the variety of this palette, originally when I heard Urban Decay was creating a Naked smoky palette I was worried that would be a palette full of varying shades of black and grey. They really knocked this one out of the park though, the palette includes highlights, blending colors, and of course the classic dark colors that create the iconic look.
 
I hope you guys give this palette a try because I highly recommend it. Let me know in the comments what you think if you do have it and what are some of your favorite colors from the palette.
Best Wishes,
Heather

Thursday, May 28, 2015

Loreal: Miss Manga vs. Miss Manga Rock


Hello Beauties!
 
Recently the drugstores released a new version of L'Oreal's famous Miss Manga mascara, "Miss Mangia Rock."
Originally I wasn't overly impressed with the regular Miss Mangia mascara, but after seeing some reviews on the 'Rock' version, I decided to give it a whirl.
The formulation of this mascara is very similar to the original, however the brushes are very different.
 
 
Original Miss Manga:
 
The original has a more traditional mascara wand shape, but it tapers towards a point. It has an almost pine cone shape. The application is more feathery compared to the 'Rock' version. This also has natural bristles as opposed to a synthetic rubber brush. It is marked to produce both volume and length on the lashes.
 
Miss Manga Rock:


This brush is very different from any other I've seen. If you look straight from the point it has a star shape (adding to the rock theme I assume) and it has a staggering almost arrow like shape along the bristles. I'm pretty sure these are synthetic bristles which can give lashes a more lengthening look. This is actually kind of strange considering the mascara is marketed for killer volume. 
 
Both mascaras give your lashes a clumpy look, if you want something more dramatic I would go for the Rock version, of you want a bit more natural, the original might be better. I personally prefer the rock because it gives a lot of volume and makes your lashes very dark and bold. Both are good mascaras though.
 
The formula is very loose for a mascara. I prefer a dryer formula because I feel that it is more controllable when building volume and manipulating the lashes. However as far as a liquidy mascara goes, this one is one of the better ones. I do tend to get it a lot on my eyelids and even on my nose a time or two (whoops!) formulas that are wetter are a lot easier to mess up on, so if your new to mascara, I recommend something with a denser formula such as L'Oreal voluminous mascara.
 
If you've tried these mascaras let me know in the comments what you think about them!
 
Best Wishes,
Heather


Tuesday, March 3, 2015

New ELF products and reviews!

 
Hello Beauties!
 
Recently I ordered some new ELF products, and after testing them out I'm ready to share my reviews. Not all of these products I got in this haul, but these are all elf products I have bought within the past few months. I am not being paid by Elf, and all opinions are my own. Now lets get started! :)
P.S. sorry some of these photos are blurry, I use my phone to take the pictures and it doesn't like to take clear close ups! Hopefully soon I'll be able to get a good camera!

ELF Baked Eye Shadows:

(Left is Pixie, Right is Burnt Plum)


I am VERY pleasantly surprised by how much I like these baked eye shadows. I haven't had good experiences with baked shadows and blushes in the past. These shadows were pigmented, smooth and bendable. And best of all cheap!! I believe I picked these up for around $3 each. The color on the left is a shimmery pink with a golden peach iridescence. The color on the right is a burgundy plum with the same peach iridescence.

ELF Ultimate Kabuki Brush:


I am in love with this brush! It is very soft, and is perfect for creating sculpted cheek bones and bronzing the face. If you wanted to you could also use it for applying foundation very quickly. This is similar to the becca brush that is meant for sculpting cheekbones. I don't own the becca brush, but I highly recommend the ELF one because its one fifth of the price.

Elf Long-Lasting Lustrous Eye shadow:

 (Colors did not have names)

These eye shadows were super creamy and metallic. It takes barely any pressure to leave an intent in the eye shadow. Also, it has an almost liquid metal appearance. These are very shimmery and metallic, and I love them a lot. The color on the left is a rose pink metallic, and the right color is a gold metallic.

ELF Moisturizing Lipstick:

 (In the color Cheeky)


These "moisturizing" lipsticks didn't feel any more moisturizing than a regular lipstick. The color is pretty and pigmented, but moisturizing ....nope. This color is a bright coral color with a satin finish.

ELF Lip Definer And Shaper:


If anyone knows if ELF sells the lip Definer as one of their regular lip liners, please let me know because this color is awesome! It is one of my absolute favorite lip liner colors. Its super matte and creamy, and when you fill in your lips with it, it makes them look super big! The shaper is a shimmery light golden pink. I really have only used this to highlight the cupids bow, but you could put this in the center of your bottom lip to fake a shiny lip look. But the Definer is my favorite from this duo. The color is a perfect 'your lips but better' color.

ELF Eyebrow Lifter and Filler:


This eyebrow lifter and filler was okay, not the best but not terrible. I liked the brow color probably the most. The pencil tip is pretty large, so it's hard to get a precise shape. If your just needing to darken the entire eyebrow area, this product might be for you. The brow highlight color I did not like at all though. It goes on very thick, it is hard to blend, and looks cakey. I like the color of it a lot, but the consistency is not good at all.

ELF Body Glow:

( In the color Glow)


This, in my opinion, is not an everyday product. I would save this maybe for special events or to places where you want your skin to look luminous, like the beach. You use this powder to dust all over your body (not your face.) A nice product, but definitely not a necessity.

ELF Mineral Lip Liner:

 (In the color Rose)


I love this lip liner! Its a pretty brownish pink lip liner that glides on smoothly and lasts long! It's more pink than a nude color, but a nice natural color.

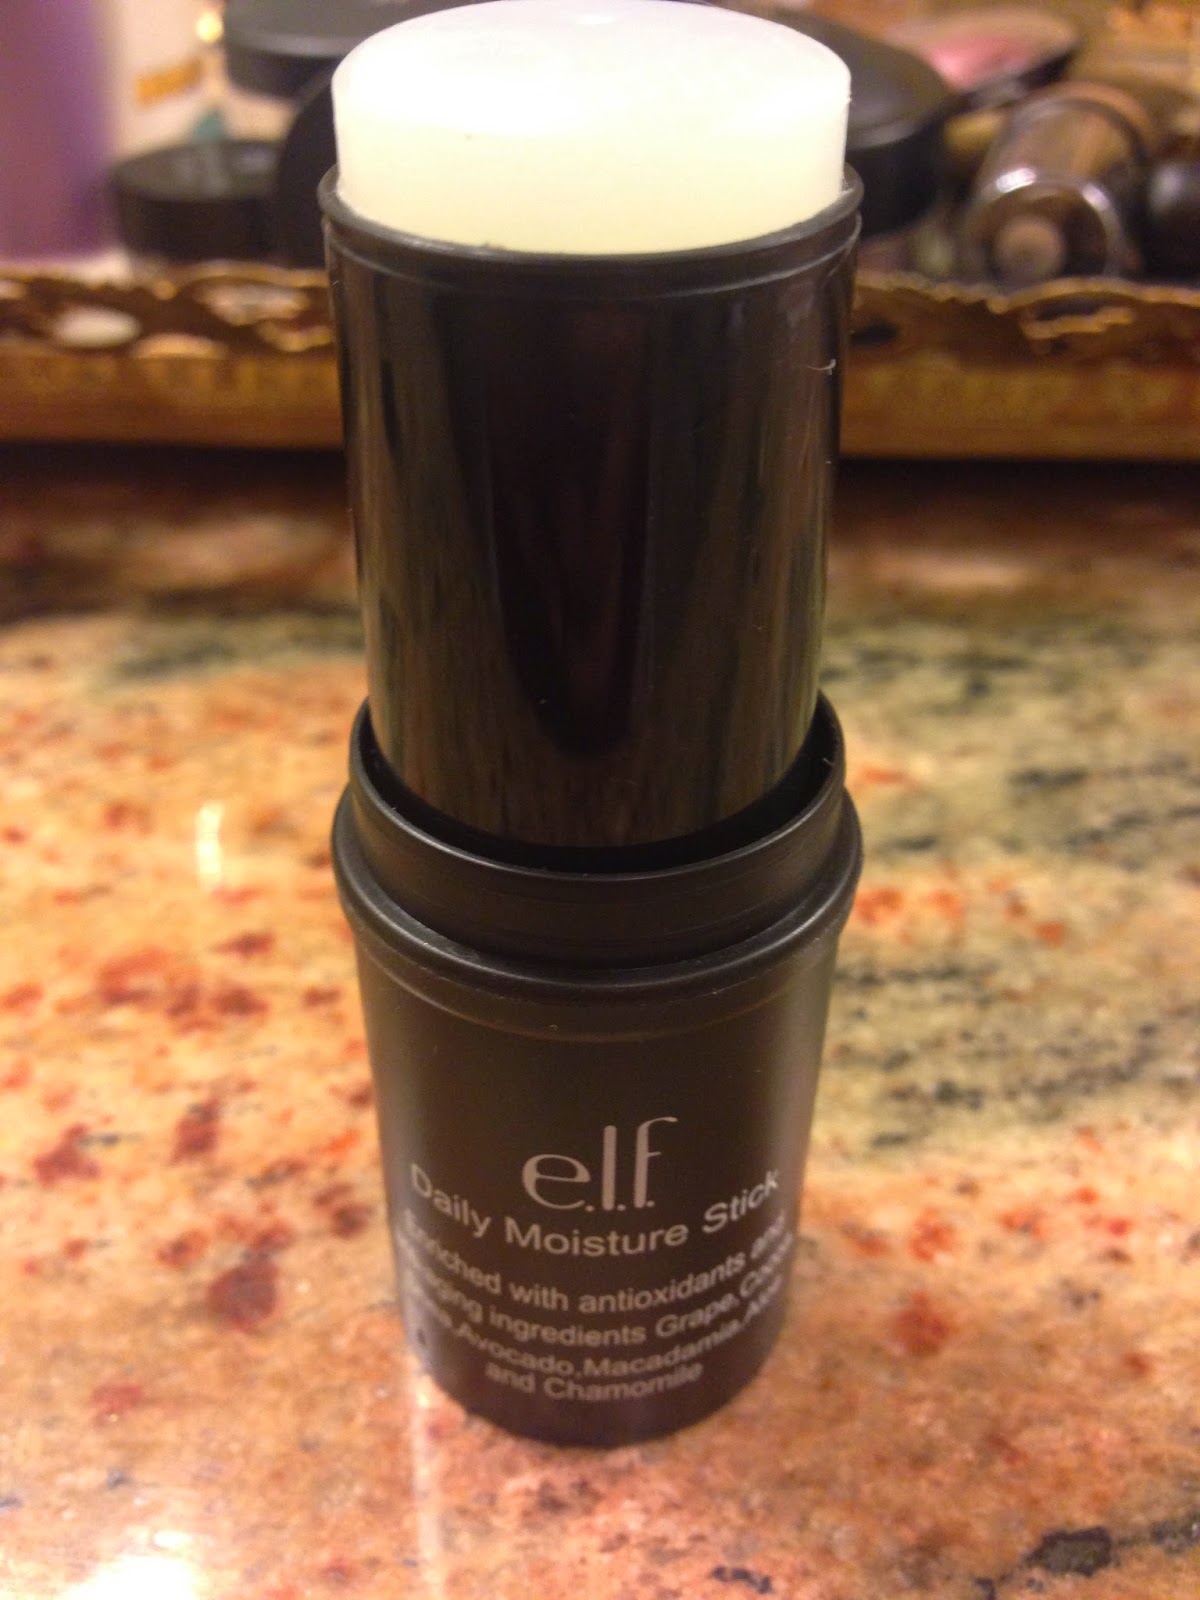
ELF Daily Moisturizing Stick:


I though because of the thick texture of this balmy moisturizing stick, it would break me out. But it didn't! Its very moisturizing and helps stop cake foundation. Also, applying this over concealer with your ring finger can help blend concealer. The only thing I don't like about this product is that it smells kind of fishy. I'm not sure if maybe they use fish oil in it, but every time I use it, I detect a faint fish smell.

ELF Lip Primer & Plumper:


The plumper side of this product works really well! If you don't like tingling in plumper then I don't recommend it. But if you don't mind it, then you will like this. The primer is very pigmented and looks chalky, but if you use a lip moisturizer first and then blend it out with your finger, it works well to cancel out your natural lip color. This doesn't come with a ton of product, which is really the only draw back.  

ELF High Definition Under eye Setting Powder:


This under eye setting powder has a slight shimmer and a light pink tint. When you use this to set your concealer, it doesn't act much differently than a regular translucent powder would. I recommend the ELF eye Brightener instead, I use it to set my under eye concealer and it adds brightness, sets it, and also helps eliminate the look of fine lines under your eyes.

ELF Mineral Face Primer:


 (Color brightening lavender)
 

This is a  silicone based primer with a purple tint that is marketed to be a brightening primer. I put this on half of my face to see if it was brighter than the other half, and they looked the same, so I would say it didn't have much of a brightening effect. The primers texture is similar to benefit Pore-fessional Primer. It's good, but nothing special if you already own the other primer.
 
 
ELF Mineral  Mist:


I originally bought this thinking it was a setting spray, but I soon found out that this is not one. I think this works best as a refreshing spray. It has a lot of minerals in it which are good for the skin, and give your skin a nice glow. This is good to use on a hot day to refresh your makeup. Or if your skin is looking dry or dull, then this will give you a beautiful glow.
 
ELF BB Cream Broad Spectrum SPF 20:
 

(Color Beige)
 

This BB Cream is a lot thicker than most BB creams. It also has a lot more coverage than most. This is also a very luminous BB cream. If you have dry skin you will probably love it. If you have oily skin, I wouldn't recommend it.
 
 
ELF Mineral Pearls:
 
(Skin Balancing)
 
 I really like these Mineral Pearls, they add a lot of brightness to the skin. And when you use a powder brush to swirl the colors together it makes it so that it is one neutral color. If you pick one up though it is pigmented enough to show the distinct color of each pearl, so they are definitely pigmented. 

ELF Baked Blush:

(In the color pink tastic)


This product is marketed as a blush, but it is basically a shimmery gold. I use it as a highlighter. It isn't the most pigmented color either as a highlighter or a blush.

ELF Hydrating Under Eye Primer:


I haven't heard of any other companies creating an under eye primer, but I really like this one! Its not overly siliconed like most primers, and it is also very moisturizing. It feels like appling an eye cream. This also helps to stop under eye concealer from caking up or creasing.

ELF Lipstick:

(In the color Seductive)


This is a highly pigmented lipstick, and smells like candy, which is always a plus. The color is a bright coral pink color. It also has a nice shine.

ELF Under Eye Rollerball:


This is a cooling and refreshing under eye roller which helps to reduce bags and take away the look of tired eyes. I like to use this at night because I feel like my dark circles are accentuated when I use this. It eventually goes away, but using it at night it how I prefer it.

ELF Smudge Pot:

(Left Popping' Pratt, Middle Gotta Glow, Right Back to Basics)


These smudge pots are beautifully creamy and rich in color. You can use your fingers or a brush and blend them out. I also like how these come in a variety of colors. Elf does cream based shadows excellently.

If you've made it to the end of this post then congratulations! Thank you for reading, and let me know what ELF products you've tried and love! :)
 
Best Wishes,
Heather


Wednesday, February 18, 2015

Kylie Jenner White and Peach Triangle Nails

 
Hello Beauties! 
 
Sorry that this post hasn't gone up sooner, but I've been super busy with work lately! 
But to make it up to you guys, here is an awesome tutorial on how to create one of  Kylie Jenner's signature nail designs!
 I love this nail look, and nail shape! Because my nails aren't this long, I have to use fake nails to shape them into a similar shape as hers. If your nails are long though, feel free to skip the fake nail step! :)
So first things first, your going to want to  use nail polish remover to clean off your nails of any nail polish residue as well as remove any natural oils on the nails that could make your nails pop off easier. Next push back the cuticles with an orange stick and file your nails to your desired shape.
If your not using fake nails, you can skip to the polishing step from here. If you are using fake nails then you may want to use a nail buffer or file to buff the surface of your nails. This will give  the nail glue something to stick to, and make it last longer. I personally skipped this step because I didn't plan on having these nails for a long time and I didn't want to ruin my natural nails.  
 
 Supplies: Nail polish remover, nail file, nail buffer, orange stick,
 nail scissors, a natural and white nail polish, and a top coat.
 
For my fake nails, I used a square shaped nail tip kit from Kiss nails, and even though it was a tip, I used it for my whole nail.
 So the first thing I did was use my nail file to shape the cuticle area of the fake nail to match mine. The nails have a very square shape and my nail bed is round so I had to take the corners down a lot. Also the nail was too wide for my tiny nails.
Keep holding the nail up to your finger to make sure you didn't file off to much or too little.
Next I used the nail scissors to trim the nail down to the desired length. I originally cut and filed the nails pretty long, but later on I took the length down a good bit more. File the nails in a tapered shape to match kylies. I personally love this shape because it really helps to elongated the fingers and make the hands look elegant.
 
Kylie has naturally narrow nail beds which help to give her a very gradual tapering to her nail. I am not as fortunate sadly so mine is kind of teardrop shaped.
Okay! So next we use our nail glue and put a drop on the back of the nail and use the tip to spread it over the nail bed area of the fake nail. Then press it on your nail for about 10 seconds and it should stay. I used the nail glue that came in the fake nail kit.
Nails before they were filed shorter
 
Next we paint the nails a color that is similar to your natural nail color. Use one or two coats depending on the intensity of the color.  I used wet and wild 204B Private Viewing. This nail polish went on very smoothly and dried quickly.

 Once this color is dry, you are going to use a white nail polish and paint and x on the nail near the base. If you need to, you can use a small nail brush for this step. I used the brush from the nail polish bottle. I used wet and wild 453B French White Crème. This nail polish was smooth, but it took a long time to dry.

Next you fill in the nail with white except for the top part of the x. This creates the top triangle shape. Then go over the white section with a second coat of white polish.
And finally add a top coat to seal in the design and clean up the cuticle area with nail polish remover and a q-tip (Which I am very bad at, I'm sorry I attempted.)
 Add some hand cream and some cute rings, and you got yourself a beautiful Kylie Jenner looking manicure. Try this out if you like it, and tag me on Instagram @thebeautycorner704 with your recreation!
 
Best Wishes,
Heather